A Simple Seed-Starting Setup for a Sunny Windowsill
Set up a small indoor sowing station with suitable containers, clear labels and crop-appropriate moisture management, while keeping the work area easy to clean.
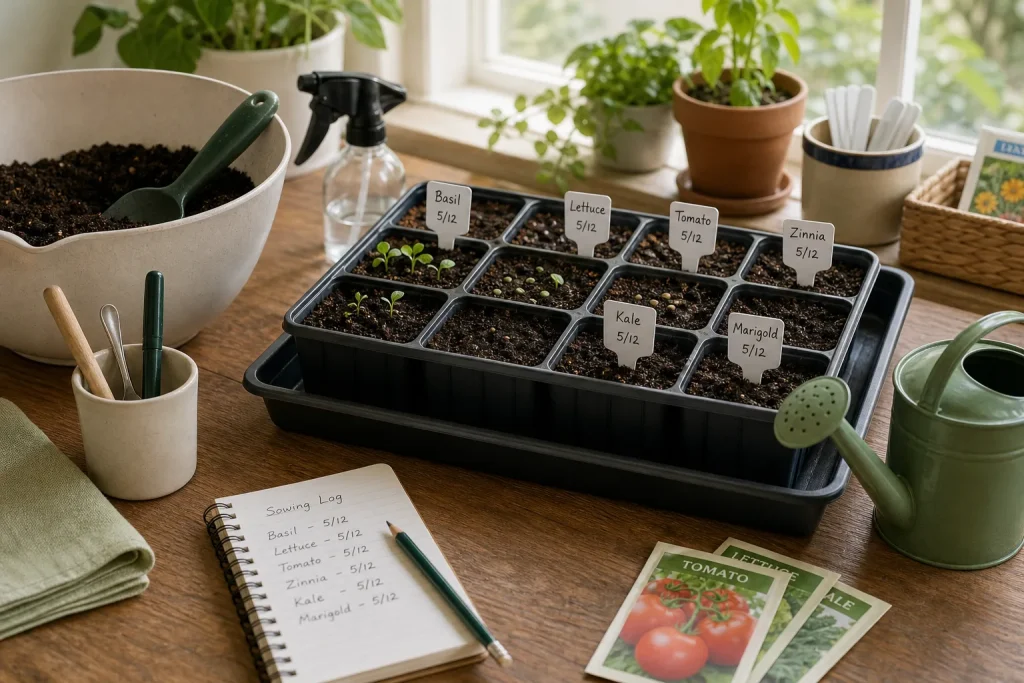
Set up a small indoor sowing station with suitable containers, clear labels and crop-appropriate moisture management, while keeping the work area easy to clean.
Growing · 7 min read
A tray of newly sown seeds can be hard to manage when several pots look alike and water gathers beneath them. A compact station helps keep each sowing identifiable and gives you a simple way to check moisture without turning care into a fixed schedule. The focus here is the sowing workflow: containers, mix, labels and crop-specific guidance.
Prepare a clean, contained sowing area
Choose a washable surface where you can handle potting mix without blocking the room’s usual use. A table near the place where you store supplies can be easier to work on than a narrow sill. Put down a waterproof mat or shallow tray to catch loose mix and drips, and leave enough room to lift each pot without tipping its neighbors.
Use clean containers with drainage holes, such as seed-starting cells, small nursery pots or washed food containers modified for drainage. If a container has no holes, use it to hold a planting pot or catch drips rather than putting mix directly into it. Rinse reused containers and remove old soil before filling them.
Choose a tray that contains spills and is easy to empty. After watering, pour away water left in the tray instead of leaving pots standing in it. This keeps the work area manageable and lets you inspect each container without confusing collected water with the moisture held in the mix.
Fill containers with a suitable seed-starting mix
Use a clean, fine-textured seed-starting mix rather than dense garden soil. Moisten the mix so it is evenly damp, then fill the containers loosely. A light tap can settle it; pressing firmly can compact the surface and make it harder for water and young roots to move through.
Before sowing, read the packet for planting depth and spacing. Seeds differ: some are placed on the surface, while others need a covering of mix. Use a teaspoon, dibber or the blunt end of a pencil to make small planting holes, then follow the packet directions for the seed in hand.
Keep the packet beside its container until the sowing is labeled. If several crops are being sown in one session, work with one packet at a time and put it away before opening the next. This simple order reduces mix-ups between similar-looking seeds.
Label each container while the seed is fresh in mind
Write the plant name and sowing date on a clean, durable label before planting. Put a label in each pot, or mark a tray only when it contains one clearly separated crop. If a tray holds different varieties, divide and label each section so that a shifted pot or label does not leave you guessing.
Use a pencil or a marker made for plant labels, and check that the writing remains readable when damp. If pencil is faint on the material, switch to a marker suitable for that label rather than relying on a note that may wash away. Keep the wording short; extra details can go in a notebook or phone note.
Place the label where it is visible without lifting the pot. If you sow more than one variety of the same plant, include the variety name as well as the crop name. Clear identification is useful later, when seedlings may look alike and you are deciding which packet’s instructions to consult.
Manage moisture according to the crop and setup
Check the mix and the container rather than watering automatically on a particular day. The surface and the pot’s weight can help you judge whether the mix is still damp or beginning to dry. If it is damp and the pot feels heavy, wait; if it is drying, water gently. The pace can vary with the container, room and mix, so treat each check as an observation, not an instruction to add water.
A narrow-spout watering can can direct water onto the mix without disturbing seeds. A spray bottle can moisten the surface gently, but may not wet the root area once seedlings are established. Watering from a tray is another option: add a little water, allow the mix to draw it up, then empty what remains. Choose a method that lets you see whether water is reaching the mix and avoid leaving the pot in standing water.
Some seed packets or growing setups call for a cover to help retain moisture. Use one only when the packet or reliable crop-specific instructions call for it, and follow their directions for ventilation and timing. Do not assume every seed needs a cover or that one removal cue suits every crop. If instructions say to remove it at emergence, do so as directed; otherwise, follow the guidance for that seed and setup.
Check seedlings and keep the station workable
When seedlings emerge, keep their labels in place and follow the packet’s advice on thinning and transplanting. If several seedlings share a small cell, wait until they are suitable to handle, then thin as directed. Where thinning is appropriate, snipping unwanted sprouts at the mix surface can avoid disturbing nearby roots.
Leave room to inspect and handle each pot. Remove fallen leaves or moldy debris, and clean tools and hands after working with the mix. If containers become crowded, move or reduce them rather than stacking pots where you cannot see their labels or check the mix.
Keep a small reset kit nearby: spare labels, a pencil or label-safe marker, a spoon or dibber, a small watering can and a cloth for spills. Store it dry, and put seed packets away after sowing. Rinse trays and tools when the session is done, then return them to the same place so the next check begins with a clear work surface.
Use a short decision list for each sowing
- Check whether the container has drainage holes; if it does, use it as the planting pot, but if it does not, use it as an outer holder or choose a drained container.
- Check the seed packet for sowing depth; if it specifies a depth, follow it, but if the packet is unclear, consult crop-specific growing guidance before covering the seed.
- Check whether the label names the crop and sowing date; if both are readable, leave it in place, but if either is missing or faint, rewrite the label before moving the pot.
- Check whether the packet or crop-specific directions call for a cover; if they do, follow their cover and ventilation instructions, but if they do not, leave the pot uncovered.
- Check the mix and pot before watering; if the mix remains damp and the pot feels heavy, wait, but if the mix is drying, water gently and empty standing water from the tray.
- Check the packet for thinning or transplanting guidance once seedlings emerge; if it gives directions, follow them when the seedlings are ready, but if it does not, seek crop-specific advice rather than pulling crowded seedlings at random.
- Check whether labels and pots are easy to distinguish; if they are, keep the arrangement, but if they are not, separate the sowings and add clear labels before continuing care.
A hypothetical worked example with two herb sowings
Imagine a gardener with one waterproof tray, two clean nursery pots with drainage holes, a packet of basil seeds and a packet of parsley seeds. These are hypothetical supplies, not a prescribed quantity. The gardener first reads both packets, noting the depth, spacing, and any directions about moisture covers. They find that the packets give different sowing instructions, so they keep the seeds separate and follow each packet rather than using one depth for both.
Next, the gardener moistens seed-starting mix, fills both pots loosely and sows each crop in its own pot as directed. Before planting, they write “basil” and “parsley,” plus the sowing date, on separate labels. They check that the writing is legible, place each label in its matching pot and set both pots in the tray. Because neither packet calls for a cover in this hypothetical, they leave the pots uncovered.
At a later check, suppose the basil pot’s mix still looks damp and the container feels heavy, while the parsley pot’s surface is beginning to dry. The gardener leaves the basil alone and waters the parsley gently, then empties any water left in the tray. The result is two distinct, traceable sowings with watering based on their observed condition. The tradeoff is that each pot must be checked on its own rather than both receiving water at the same time.
A small seed-starting station works best when each container has a clear identity and care follows the relevant packet rather than a universal rule. Keep the instructions with the sowing, check the mix before watering, and adjust the setup when a label, tray or pot makes the next decision unclear.